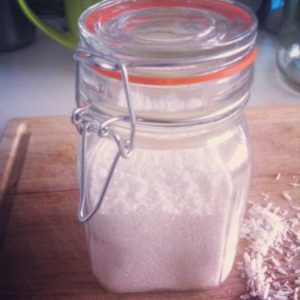
Coconut milk, like other nut and seed milk, is a great alternative to pasteurized cow’s milk and definitely my favorite dairy-free “milk” alternative. Not only is it delicious and creamy, but also nutrient-dense and high in healthy fats – primarily medium-chain triglycerides (MCTs), which require minimal digestion and are shuttled directly to the liver for an immediate fuel source rather than being stored as fat.
When you first start transitioning your diet away from pasteurized cow’s milk, store-bought dairy alternatives are obviously the easiest way to get you across that bridge. Once they become a staple in your diet though and you find yourself using them regularly, there comes a point when it makes sense to step things up and start making them from scratch yourself.
Let’s face it, those store-bought tetra paks, cartons, and cans might be fine when you’re in a pinch, but the fact is, they’re in no way pure and do contain preservatives and other additives such as carrageenan and guar gum (used as thickening agents), which can give some people digestive troubles. And of course, there’s the issue of BPA (Bisphenol-A) if you’re buying canned milk – unless you’re able to find one that’s BPA-free.

Thankfully making your own coconut milk at home is super simple and affordable. All you need is a bag of unsweetened coconut flakes – that’s it! You can even use the leftover coconut pulp from the recipe below to make your own homemade coconut flour. This is a pretty sweet bonus as I’m sure you can attest to if you do any gluten-free or grain-free baking – you know the cost of store-bought coconut flour can be a bit on the pricey side.
Homemade Coconut Milk Recipe
Ingredients
- 4 cups of hot water (not boiling)
- 1.5 – 2 cups of unsweetened coconut flakes
Instructions
1. Place coconut flakes and water into a high-speed blender (I used my Vita-Mix) and blend on high for a few minutes until thick and creamy. If all the water doesn’t fit you can do this in two batches.
2. Pour blended milk through a mesh sieve or colander to strain the coconut pulp, then squeeze it through a cheesecloth or nut milk bag to filter out the finer pieces of coconut (see my note below). If you split the water into two batches add the strained coconut pulp back into the blender with the second batch of water and repeat above steps.
3. Use immediately or store in the refrigerator in a glass container. Use within 3-4 days for the best flavour and texture. Since there are no emulsifiers or thickening agents, you’ll notice the cream may separate from the milk. Give it a shake before using it. You can also throw the accumulated hard lump of cream into a smoothie to make it extra creamy and decadent.
4. Put aside strained pulp (or refrigerate for later use) if you’d like to make coconut flour (optional).
Notes: I usually don’t bother squeezing the milk through a cheesecloth or nut milk bag since I don’t mind my milk a little “pulpy”. I usually use my coconut milk as a base for smoothies and I don’t mind a little extra texture:)
Homemade Coconut Flour Recipe
Instructions
1. Preheat oven to 250 F and spread coconut pulp on a parchment-lined baking tray.
2. Dry in the oven for 45-60 minutes, until all the moisture has evaporated.
3. Place dried coconut into a high-speed blender (or food processor) and blend for about 40-60 seconds.
4. Store in an airtight container and use it for future baking.
Notes: This yields about 1 cup of coconut flour which is great since most recipes only call for ¼ cup to ½ cup of coconut flour due to its highly absorbent nature.

Enjoy!
Do you like making your own coconut milk and flour? In the comments below share with me your tips, tricks and recipes!

Hi! I’m Elaine, a Certified Nutritionist and Master Certified Health Coach. I support women in achieving their health and body goals while prioritizing a peaceful and balanced relationship with food.

Get a free copy of my handbook!
The Elegant Eating Handbook: Timeless Strategies for Lasting Weight Loss and a Peaceful Relationship with Food.
share with friends
keep reading...


